xpdf를 이용하여 pdf 변환하기
R · 케이플러스 한성탁 ·오픈 소프트웨어인 xpdf를 사용하여 pdf 파일에서 텍스트를 추출하거나 pdf파일을 이미지로 변환하는 등의 작업을 해보겠습니다.
작업은 윈도우10 64bit 환경에서 진행되었습니다. 먼저 http://www.xpdfreader.com/download.html 에서 윈도우용 xpdf를 다운받습니다.
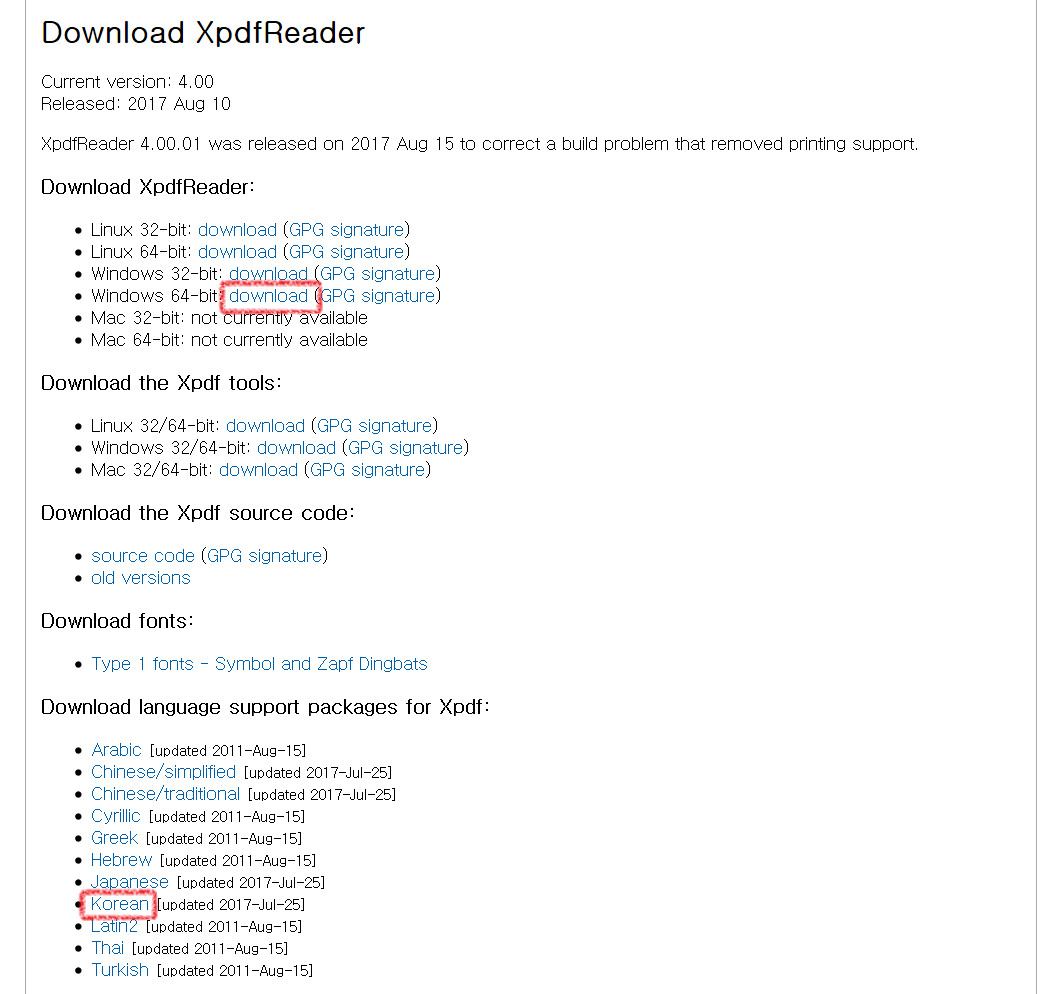
xpdf는 32bit용 실행파일, 64비트용 실행파일과 설명 파일로 구성되어 있습니다.
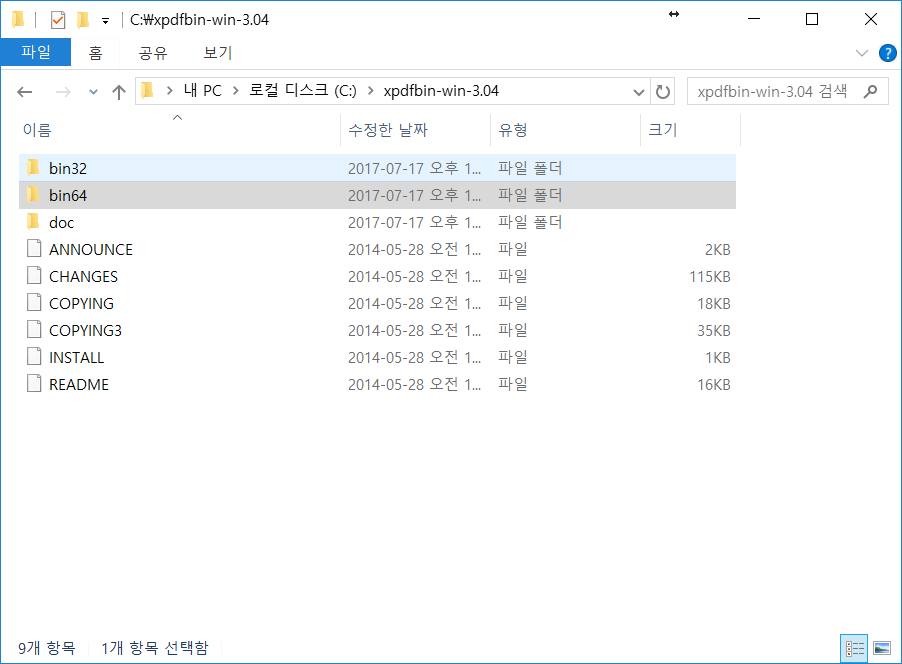
적당한 위치에 압축을 해제하고, Korean language support package도 다운 받습니다. 다운받은 언어 파일을 64비트 실행파일이 있는 폴더에 압축 해제합니다. 다른 폴더에 압축을 풀어도 무방합니다. 단 C:\Program Files\ 같은 경로처럼 파일 경로에 빈칸이 포함될 경우 에러 메시지가 출력될 수 있습니다.
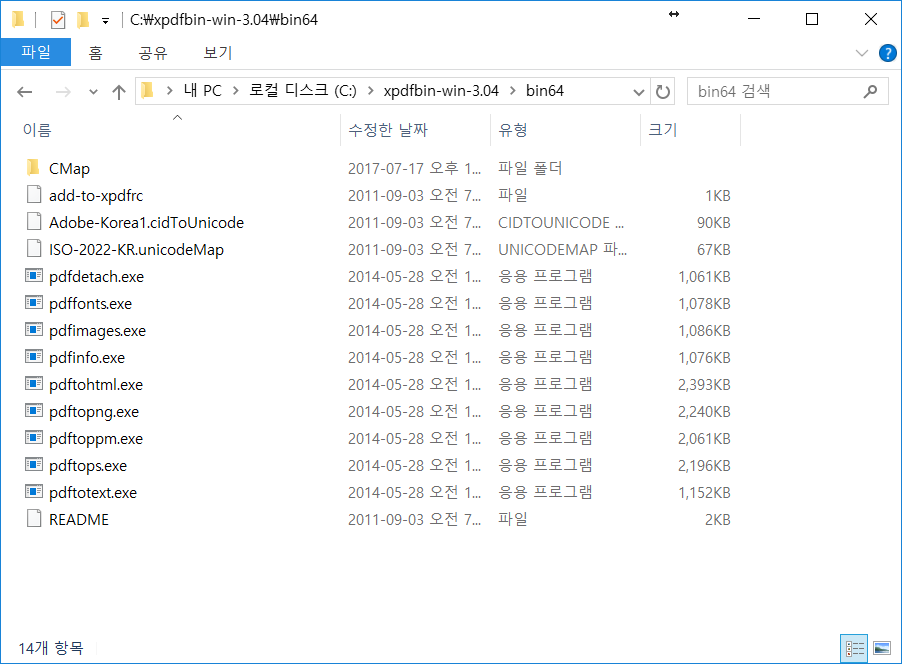
그리고 나서 doc 폴더에 있는 sample-xpdfrc 파일을 64비트 실행파일 폴더로 옮기고 파일명을 xpdfrc로 변경해줍니다. 그 후 add-to-xpdfrc 에 있는 내용을 xpdfrc에 복사하여 붙여넣고 xpdfrc의 내용 중 #textEncoding 이 있는 줄에서 #를 제거하여 인코딩을 UTF-8로 설정합니다.
또는 메모장에서 다음 내용을 복사한뒤 64비트 실행폴더에 xpdfrc로 저장해줍니다. 저장할 때 형식을 ‘모든 형식’으로 하고 확장자를 입력하지 말하야합니다.
#========================================================================
#
# Sample xpdfrc file
#
# The Xpdf tools look for a config file in two places:
# 1. ~/.xpdfrc
# 2. in a system-wide directory, typically /usr/local/etc/xpdfrc
#
# This sample config file demonstrates some of the more common
# configuration options.  Everything here is commented out.  You
# should edit things (especially the file/directory paths, since
# they'll likely be different on your system), and uncomment whichever
# options you want to use.  For complete details on config file syntax
# and available options, please see the xpdfrc(5) man page.
#
# Also, the Xpdf language support packages each include a set of
# options to be added to the xpdfrc file.
#
# http://www.foolabs.com/xpdf/
#
#========================================================================

#----- display fonts

# These map the Base-14 fonts to the Type 1 fonts that ship with
# ghostscript.  You'll almost certainly want to use something like
# this, but you'll need to adjust this to point to wherever
# ghostscript is installed on your system.  (But if the fonts are
# installed in a "standard" location, xpdf will find them
# automatically.)

#fontFile Times-Roman		/usr/local/share/ghostscript/fonts/n021003l.pfb
#fontFile Times-Italic		/usr/local/share/ghostscript/fonts/n021023l.pfb
#fontFile Times-Bold		/usr/local/share/ghostscript/fonts/n021004l.pfb
#fontFile Times-BoldItalic	/usr/local/share/ghostscript/fonts/n021024l.pfb
#fontFile Helvetica		/usr/local/share/ghostscript/fonts/n019003l.pfb
#fontFile Helvetica-Oblique	/usr/local/share/ghostscript/fonts/n019023l.pfb
#fontFile Helvetica-Bold		/usr/local/share/ghostscript/fonts/n019004l.pfb
#fontFile Helvetica-BoldOblique	/usr/local/share/ghostscript/fonts/n019024l.pfb
#fontFile Courier		/usr/local/share/ghostscript/fonts/n022003l.pfb
#fontFile Courier-Oblique	/usr/local/share/ghostscript/fonts/n022023l.pfb
#fontFile Courier-Bold		/usr/local/share/ghostscript/fonts/n022004l.pfb
#fontFile Courier-BoldOblique	/usr/local/share/ghostscript/fonts/n022024l.pfb
#fontFile Symbol			/usr/local/share/ghostscript/fonts/s050000l.pfb
#fontFile ZapfDingbats		/usr/local/share/ghostscript/fonts/d050000l.pfb

# If you need to display PDF files that refer to non-embedded fonts,
# you should add one or more fontDir options to point to the
# directories containing the font files.  Xpdf will only look at .pfa,
# .pfb, .ttf, and .ttc files in those directories (other files will
# simply be ignored).

#fontDir		/usr/local/fonts/bakoma

#----- PostScript output control

# Set the default PostScript file or command.

#psFile			"|lpr -Pmyprinter"

# Set the default PostScript paper size -- this can be letter, legal,
# A4, or A3.  You can also specify a paper size as width and height
# (in points).

#psPaperSize		letter

#----- text output control

# Choose a text encoding for copy-and-paste and for pdftotext output.
# The Latin1, ASCII7, and UTF-8 encodings are built into Xpdf.  Other
# encodings are available in the language support packages.

textEncoding		UTF-8

# Choose the end-of-line convention for multi-line copy-and-past and
# for pdftotext output.  The available options are unix, mac, and dos.

#textEOL		unix

#----- misc settings

# Enable FreeType, and anti-aliased text.

#enableFreeType		yes
#antialias		yes

# Set the command used to run a web browser when a URL hyperlink is
# clicked.

#launchCommand  viewer-script
#urlCommand	"netscape -remote 'openURL(%s)'"

#----- begin Korean support package (2011-sep-02)
cidToUnicode	Adobe-Korea1	C:/xpdfbin-win-3.04/bin64/Adobe-Korea1.cidToUnicode
unicodeMap	ISO-2022-KR	C:/xpdfbin-win-3.04/bin64/ISO-2022-KR.unicodeMap
cMapDir		Adobe-Korea1	C:/xpdfbin-win-3.04/bin64/CMap
toUnicodeDir			C:/xpdfbin-win-3.04/bin64/CMap
#fontFileCC	Adobe-Korea1	/usr/..../batang.ttf"
#fontFileCC	Unidocs-Korea1	/usr/..../batang.ttf"
#----- end Korean support package
- 참고) Korean support package (2011-sep-02) 부분에서 경로 부분은 Korean 패키지 파일의 압축을 푼 경로로 지정해야 합니다.
위의 내용은 xpdf에서 한글을 인식하기 위한 기본적인 설정입니다. 필요한 설정을 하실경우 변경하서셔 사용하면 됩니다.
이제 pdf를 텍스트 파일로 변환해보겠습니다. xpdf를 사용하기 위해서는 명령 프롬프트를 이용하거나 배치(bat) 파일을 사용하면 됩니다.
윈도우키 + R을 눌러 실행 창을 연 다음 cmd를 입력하여 명령 프롬프트를 엽니다(xpdf는 Powershell에서는 동작하지 않습니다).
적당한 pdf파일을 pdftotext.exe가 있는 폴더에 옮깁니다. Matrix 패키지의 pdf파일을 사용해보겠습니다. 다른 이름으로 저장을 클릭하여 다운받으세요.
이제 cmd 창을 열어서 pdftotext.exe가 있는 폴더로 가서 pdftotext라고 쳐보겠습니다.
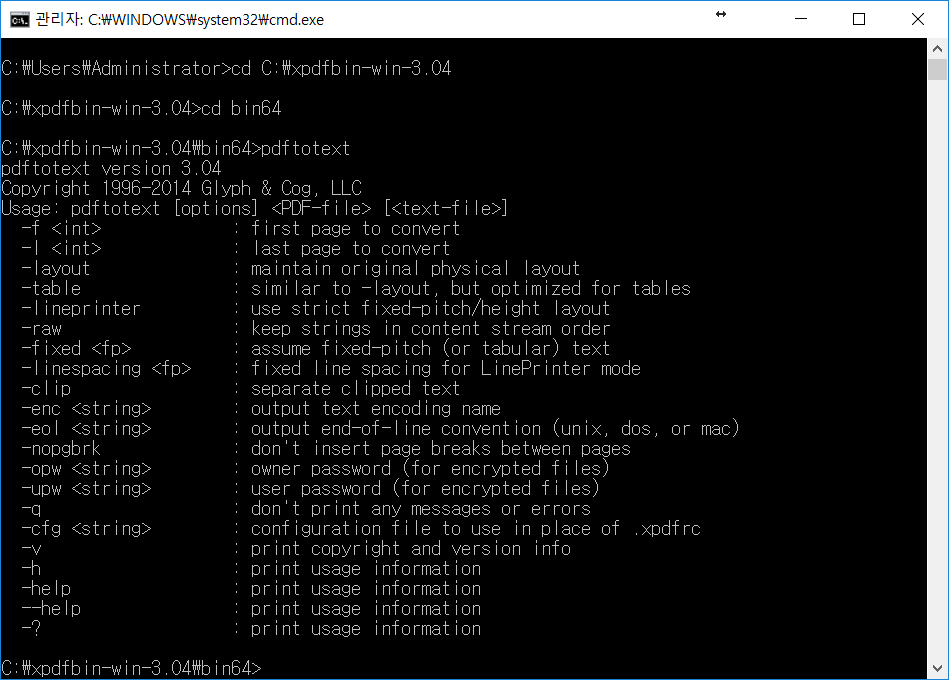
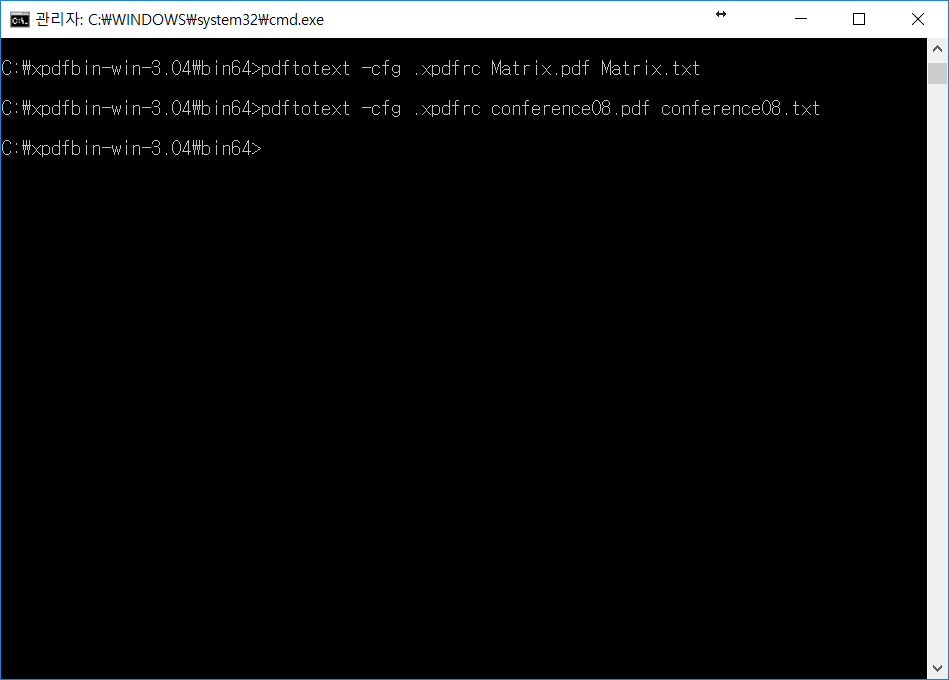
도움말이 나옵니다. pdftotext [옵션] [pdf파일] [결과 파일 경로] 식으로 입력하면 되는 것을 볼 수 있습니다. 한국어를 인식하기 위해서 옵션 부분에 -cfg .xpdfrc를 넣어 줍니다. Matrix.pdf 파일의 경우 영어만 있는 pdf파일이기 때문에 옵션을 넣기 않아도 잘 변환됩니다.
pdftotext -cfg .xpdfrc Matrix.pdf Matrix.txt

이번엔 한글 pdf파일을 변환해보겠습니다. pdf파일은 검색을 통해 임의로 나온 파일을 골랐습니다.
마찬가지로 cmd 창에서 변환합니다.
pdftotext -cfg .xpdfrc conference08.pdf conference08.txt
오류 없이 잘 실행되었습니다. 몇몇 pdf파일의 경우 사용된 폰트나 기타 이유에 따라 드문 확률로 오류가 나기도 합니다.
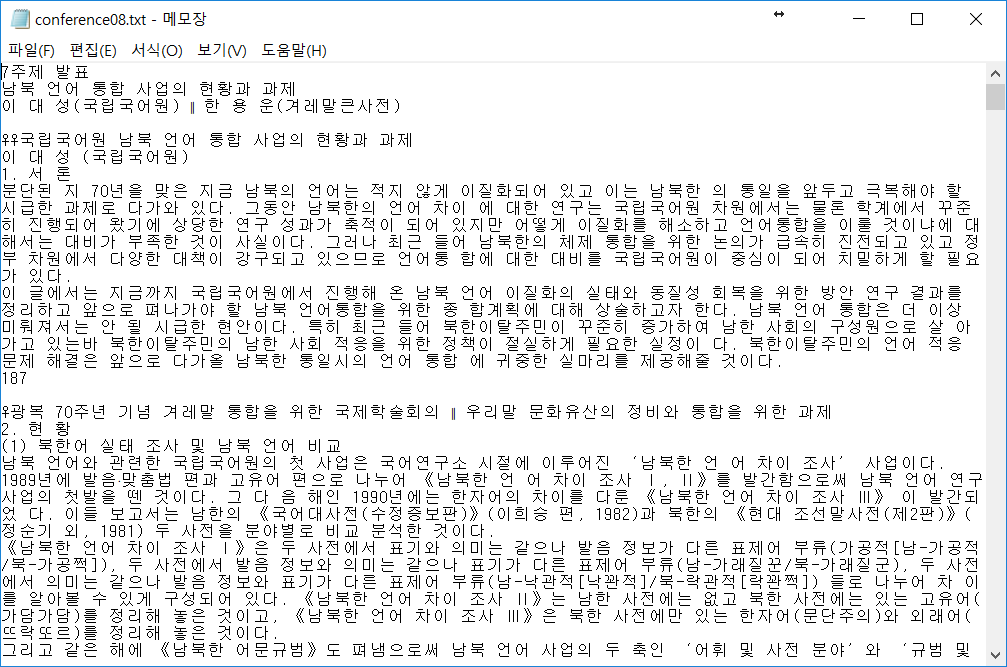
확인 결과 텍스트 추출이 잘 되었습니다. 테이블이나 그래프가 많은 pdf 파일의 경우 군더더기가 많이 나오므로, 텍스트의 가독성 등을 향상하기 위해서는 텍스트 추출 후 사용자의 적절한 처리가 필요합니다.
다음으로는 R을 통해 이 과정을 자동화해보겠습니다.
require(stringr)

pdf_exe = "C:/xpdf-tools-win-4.00/bin64/pdftotext.exe"
pdf_path = dir("C:/xpdf-tools-win-4.00/bin64/", pattern = ".+\\.[pP][dD][fF]", full.names = T)
txt_path = str_replace(pdf_path, "\\.[pP][dD][fF]", "\\.txt")

command = str_c(pdf_exe, " -cfg .xpdfrc ", pdf_path, " ", txt_path)
command

for(i in 1:length(command)){
  system(command[i])
}
먼저 exe 파일의 경로를 지정합니다. pdftotext 외의 다른 파일도 지정할 수 있습니다. 파일에 따라 command의 구조를 약간 수정해야 할 수도 있습니다.
pdf파일들이 있는 폴더에서 dir() 함수를 통해 pdf 파일 목록을 읽어옵니다. pattern 인수로 .pdf, .PDF 파일 등이 아닌 파일을 정규식을 통해 필터링하고, full.names = TRUE로 하여 전체 파일 경로를 읽어옵니다. 또한 txt_path의 경우 pdf파일이 위치하는 곳에 그대로 txt파일이 생기도록 확장자만 변경하였습니다. 마지막으로 파일 목록과 명령어를 합쳐줍니다.
그리고 system() 함수를 통해 명령어를 실행시켜주면 자동으로 변환 가능합니다. 지정한 폴더를 확인하면 텍스트 추출의 결과물을 확인할 수 있습니다.

(17년 12월 13일 기준 xpdf는 4.00.01로 업데이트하였고 korean support package도 업데이트 되었으나 사용방법은 동일합니다.)